Clean MacBook Pro Fans: Elevate Performance, Prevent Heat
Who Is This Article For?
Experts: This article addresses complex, technical topics in computer tech support, assuming extensive knowledge and experience in the field.
Table of Contents
Can Dust Get Inside A MacBook Pro?
What Happens If You Don't Clean Your MacBook Pro Fan?
How Often Should You Clean a MacBook Pro Fan?
MacBook Pros are known for running hot as the fans aren't programmed to spin up until the device reaches a high temperature to keep the device silent. So, to prevent any overheating you should clean fans on MacBook Pro periodically. I can't stress enough how important it is to clean the fans, and in general the entire MacBook Pro internals.
Disclaimer: This article is a general guideline that portrays steps to disassemble a 2015 MacBook Pro. Pieces and steps, although similar, may vary from model to model.
Can Dust Get Inside A MacBook Pro?
Yes, dust can and often does get inside a MacBook Pro. Over time, as the laptop draws in air to cool its internal components, it can also pull in dust, pet hair, and other small particles from the surrounding environment.
What Happens If You Don't Clean Your MacBook Pro Fan?
The dust can accumulate on the fans, vents, and other internal components, which can lead to the following issues:
Issue 1: Overheating
Dust acts as an insulator and will make your fans run heavy and slow, and block vents on the cooling system, reducing its efficiency. This will cause overheating, at the very least it will cause thermal throttling (where the CPU reduces its speed to prevent overheating) and in a lot of cases burn and damage vital components of the logic board, like the CPU or other integrated circuits.
Think about it, overheating is an issue on that count on numerous cooling fans and big heat sinks, on a close and tight casing like the one on the MacBook Pro the problem is far more worrisome, a big part of the MacBook Pro’s internal space is occupied by the batteries, a component especially sensitive to heat, ion lithium batteries should not go over 45ºC.
Issue 2: Fan Noise
As dust accumulates on the fan blades and in the fan's housing, the fans might need to spin faster to cool the system, leading to increased noise. Additionally, uneven dust distribution can cause the fans to be unbalanced, which might produce additional noise or vibration.
Issue 3: Reduced Performance
As mentioned earlier, if a MacBook Pro starts overheating the CPU or Silicon chip will start to thermal throttle, leading to big losses on performance.
Issue 4: Shortened Lifespan
Prolonged overheating can significantly impact the lifespan of microprocessors. Chips have a failure rate that's linked to usage time and sustained temperatures. This means microprocessors can fail due to age, high heat, or extended periods of moderate heat.
For devices like a MacBook Pro, protecting against heat is key to longevity. The cooler a device runs, the longer its electronic components are likely to last.
It's important to ensure good ventilation and avoid exposing your device to high temperatures for extended periods. This can help maintain the performance and lifespan of your MacBook Pro's internal components.
How Often Should You Clean a MacBook Pro Fan?
You must periodically clean fans on your MacBook Pro, if you're comfortable doing so (or with the help of Prime Tech Support’s professional MacBook Pro Cleaning and Maintenance services), open it up to clean out any accumulated dust from the fans and internal components.
We recommend you do a deep cleaning every six months or less, depending on the use you give it, if you work in an environment with dust, smoke or pets give it a deep cleaning every 3-4 months.
How Do I Clean The Dust Out Of My MacBook Pro Fan?
1. Power Down And Disconnect
Make sure to fully shut down your MacBook Pro and disconnect it from the wall plug. To do so, follow these steps:
- Go to the top right-hand corner and you will see an Apple logo.
- Tap on that Apple logo and then you'll see the shutdown button, press on it.
- A pop up will appear with the message “are you sure you want to shut down your computer now?
- Press on shutdown again and it's going to automatically shut down.
2. Gather The Right Tools
For this task, you'll be using:
- Compressed air/blower.
- Isopropyl alcohol.
- Microfiber cloth.
- P5 screwdriver, prepare yourself with the right screwdriver for your MacBook Pro model as Apple has a few different proprietary screws on its devices, google your model and check exactly which screwdrivers are needed for unscrewing the case and the fans.
- ESD nylon spudger.
3. Removing The Screws

Source: Prime Tech Support
Turn the MacBook Pro over and remove all the screws on the bottom cover. Next, we can remove the P5 screws holding the back panel in place, with the screws removed, the back panel is still clipped in with clips in the middle of the laptop, which can be tough to get undone.
Depending on your model you might need to press a suction cup into place of the lower case and pull up to open a small gap.
Slide the corner of a plastic tool into the gap and begin to open around the nearest corner and then halfway up the side of the MacBook Pro. This releases the first of the hidden clips securing the bottom cover.
Lift the front edge of the lower case and pull firmly to slide the lower case towards you. First pull one corner, then the other, be careful when removing the back panel as it's very thin and razor sharp.
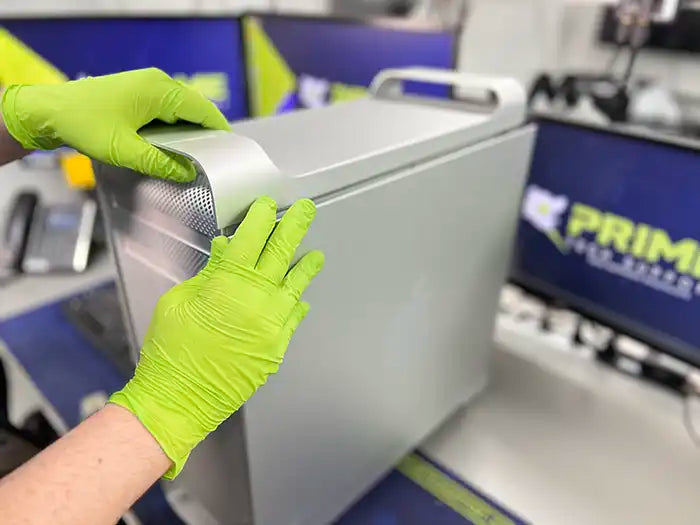
4. Thoroughly Cleaning The Case
Source: Prime Tech Support
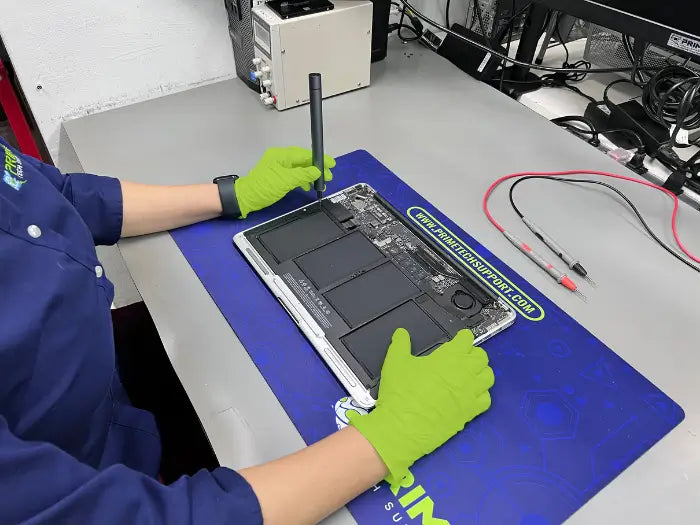
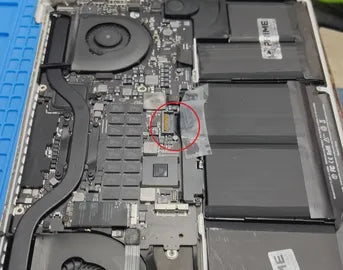
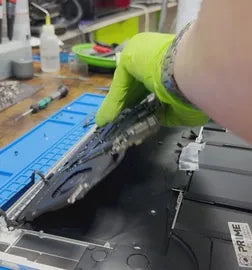
The first thing you’re going to do is disconnect the battery to avoid any power running through the device. Use only a nylon spudger as something hard like a flat head screwdriver will damage the pins, and you don’t want to turn a “cleaning fans on MacBook Pro” project into a “how to repair a broken pin on the battery connector of a MacBook Pro” but if for any reason you needed one check our MacBook Pro Repair Diagnostic in Miami, Florida. Use compressed air and a brush for cleaning the case and the internals. It's crucial to be careful, avoiding moisture and static that can harm the components.
At this point of a MacBook Pro maintenance service at Prime Tech Support, we would test the fans, to check for damaged blades or bearings, given the case that one or both fans were damaged we would replace them right away.
5. Detach The Fans Screws And Flex Cables
Source: Prime Tech Support
Step A: Remove Left Fan
- Locate Left Fan: Identify the fan assembly on the left-hand side of the laptop.
- Disconnect Flex Cable: Carefully disconnect the flex cable attached to the left fan (2 & 3).
- Lift the Rubber Band over the Left Side Fan (5)
- Remove Screws: Unscrew the three screws (4,6 &7) securing the left fan.
- Remove Left Fan: Gently lift and remove the left fan from its position.
- Inspect for Dust: Check for any dust accumulation underneath the fan.
Step B: Remove Right Fan
- Move to Right Side: Shift your focus to the right-hand side of the laptop.
- Lift the Rubber Band over the Right-Side Fan (8)
- Disconnect Airport Card: Carefully disconnect the airport card. (9 &10)
- Disconnect Flex Cables: Remove a couple of flex cables connected in this area. (11)
- Unscrew Fan and Wi-Fi Card: Start unscrewing the fan and the Wi-Fi card on the right side. (12, 13, 14 &15)
- Access Second Fan's Flex Cable: This step will expose the flex cable connected to the second fan.
- Disconnect Second Fan's Flex Cable: Detach the flex cable connected to the right fan. (16)
- Remove Right Fan: Carefully lift and remove the right fan from the laptop.
Tips:
Proceed with Caution: Be gentle when handling internal components of the laptop.
Keep Track of Screws: Organize the screws to ensure they go back in the correct place during reassembly.
Use Proper Tools: Employ the appropriate screwdrivers and prying tools for disassembly.
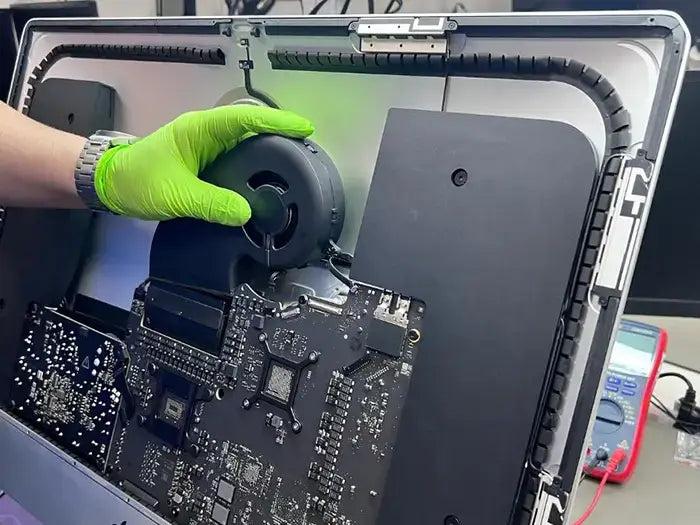
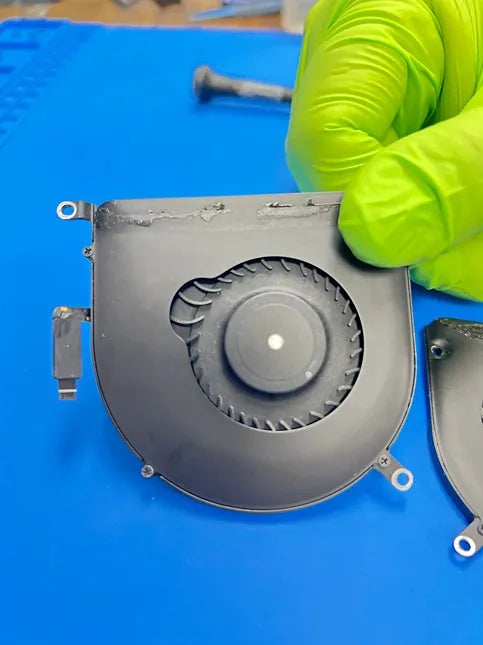
6. Carefully Cleaning The Fan
Source: Prime Tech Support
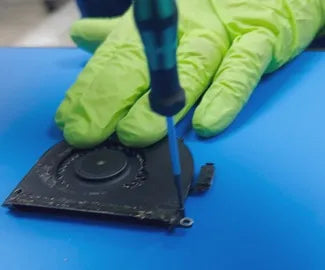
Taking a closer look at the fans, it's time to get these looking like new. While you could just hit them with some compressed air and a brush at this point, it's even better to disassemble them a little bit further to get better access to the actual fins of the fan. With three screws, the outer shell comes right off, and this gives much better access to give these a good clean.
Source: Prime Tech Support

Source: Prime Tech Support
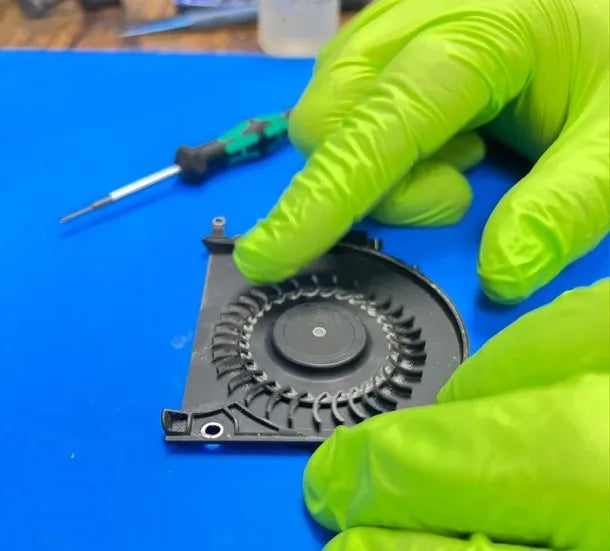
Use a brush and some alcohol to give it a good cleaning. Now, we wouldn't recommend using regular household brush on certain parts of the motherboard or anything that as it's not electrostatic safe, but for a fan, it's going to work just fine.
At the lab we go even deeper, we remove the fan itself and go deep on every nook and cranny of the fan, for this you must be EXTRA CAREFUL as not to damage the super thin copper wires that feed the fans tiny motor.
We use only isopropyl alcohol for these plus other proprietary techniques to get every component we get for maintenance looking good as new.

Source: Prime Tech Support
After a good clean, give it a go with some compressed air just to finish things off.
It's now time to do the other fan, repeating the exact same process to remove all that dust and grime. Once we've given the insides of both fans a good clean, you can turn your attention to the back panel, go on and brush it down, removing any dust.
Source: Prime Tech Support
The final thing left to do with these fans is, of course, reassemble them. Putting back in the three screws for each fan, you can see just how much cleaner these are looking.
7. Carefully Re-Assembling Your MacBook Pro
With the internals clean, the last step is to put back the back panel. Give it a good clean, reattach it to the MacBook, and reinstall the screws. After a final outer clean, the task is done.
Conclusion
It is very important that anyone with an older or hot-running MacBook Pro clean it and apply new thermal paste. Otherwise, heat build-up will surely damage your device. For better fan control on Macs, consider using a program called "Mac Fan Control".
If you want the best possible maintenance service for your MacBook don’t hesitate to come to Prime Tech Support’s our MacBook Pro Cleaning and Maintenance service.
Articles You Might Be Interested In
MacBook Pro Logic Board Replacement: Comprehensive Guide
DIY MacBook Pro DC Jack Repair: Tools and Steps
What to Look Out For When Transferring Data on Your MacBook Pro
Share this
Explore more
Popular posts

Popular posts
Same-day repairs
Mac Repairs
Fast tech support for Mac Computers. We exceed customer expectations and ensure satisfaction.